Silicon Carbide Lapidary Grinding Wheel
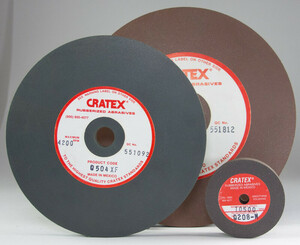
Premium Lapidary Abrasives from CRATEX Manufacturing Co. are everything that you’ve ever needed! Made from purest silicon carbide bonded with premium grade oil-resistant chemical rubber, CRATEX large lapidary wheels found application in numerous lapidary techniques!
Premium SiC Lapidary Grinding Wheel
Country of origin: Mexico
Manufacturer: Cratex Manufacturing Co, 328 Encinitas Blvd, Suite 200, Encinitas, CA 92024
Material: Silicon Carbide
Bond: Rubber bonded
If you find some of our lapidary polishing wheels or other abrasives does not perform as promised it is returnable for a full credit or exchange.
Silicon carbide wheels have long been the standard for cabochon cutting, so they’re ideal for wet sanding, grinding and different kinds of polishing of gemstones. Simply choose the wheel size (from 1” to 6”), arbor hole, desired grit (from coarse to extra fine), order and enjoy cabbing! WARNING: We hear cabbing is highly addictive, so be careful!
Tools & Supplies for Lapidary Artists
If you need more information about CRATEX products, please contact us by phone 800-800-4077 or email sales@cratex.com
Introduction to Lapidary
Lapidary (also called gemcutting) is the art of transforming stones and precious gems into beautifully polished rocks and precisely carved decorations. A person who uses various precision tools to transform these earth-crusted stones into jewelry and wonderful works of art is called a gemcutter or a lapidary (sometimes lapidarist).
Precision tools are not the only set of skills a lapidary will need to own. Most important values are patience, dedication, love for precision work and passion for gems, as well as the vision to recognize the full potential of a raw stone. You’ll need to study it, its density, shape and color, create an image in your mind about what the finished gem is going to look like, and then you’ll pick out proper tools.
Right tools are just the piece of the puzzle but are just as important. A lapidary has knowledge in operating a variety of power saws, drills, sanders, grinders and sometimes engravers.
Since lapidary is such an amazing art, we decided to create a Lapidary 101 article with a prime goal to introduce various lapidary arts and techniques, necessary equipment, various How-to projects (coming soon!) and CRATEX tools used by lapidarists. ENJOY!
Click the icon to jump to the desired section

CHAPTER 1
Basic Lapidary Arts

CHAPTER 2
Lapidary Techniques
CHAPTER 3
Lapidary Equipment
CHAPTER 4
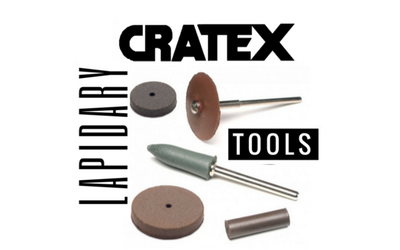
CRATEX Lapidary Tool
CHAPTER 5
Lapidary Work Safety Precautions
Basic Lapidary Arts
CHAPTER 1
In this chapter we’ll introduce the four basic lapidary art forms: tumbling, cabbing, faceting and carving.
Rock Tumbling
Tumbling is the simplest form of lapidary, as it requires minimal equipment. The equipment is not expensive and tumbled stones make wonderful homemade gifts. To tumble rocks, you’re going to need: rocks of similar hardness (hard rocks will eat up your soft rocks, so keep them similar!), a plastic or a rubber-lined barrel, abrasive grit (silicon carbide is used most often) and a liquid lubricant (universal lubricant is water).
The barrel is then loaded with rocks, abrasive grit and lubricant, and placed on slowly rotating rails. The appropriate rotating speed depends on the materials and the size of the barrel. The process reminds of the natural process of creating sea glass - as the barrel rotates, the rocks will slide past each other with the abrasive grit between them, which will cause smoothing and polishing of rough surfaces. Watch your rocks turn for a few minutes to see if more water is necessary or not.
The full process usually takes three to five weeks and it depends on the hardness of the rocks and the shape that you want to achieve by the coarser grits, so it is important to check your rocks daily for desired shape and smoothness.
Tumbling starts with coarser grits, after which progressively finer grades are used with washing between switching grades. You’ll need to clean your barrel well before the next step, as any grit left from the coarse tumble will possibly reintroduce scratches into your piece.
Polishing is the last phase and it involves the usage of powered polish, water and small plastic pellets that have cushioning effect.
Besides the barrel tumblers (rotating tumblers) there are also vibratory tumblers with vibrating rather than rotating barrels. Although barrel tumblers are more common, mostly because they are less expensive, simpler and quieter, there are some situations where vibratory tumblers are a better choice. For example, you should use them when making tear drop forms and faceted shaper, because they will retain the overall shape of the rock (barrel tumblers won’t keep protect the shape of the rocks but will make them round).
Tumbling tip: Add one table spoon of Old Miser into the barrel. It will keep the grit from clumping together and give you a tumbling slurry almost immediately. By holding the grit to the stone, it will speed up the process and save the grit.
Cabbing
Cabochon cutting, or cabbing is the most common lapidary art. Even if a person is not familiar with the name, we’ve all seen jewelry gems that have a flat bottom and a curved or domed top. These are called cabochons.
The cabbing equipment is much more serious (therefore expensive) than the tumbling equipment, so it can be quite a profitable hobby. In case you use gems that you find yourself, it can be even more rewarding.
Unlike tumbling, which can be an amazing pastime activity for the whole family, cabbing is more complex, as you’ll need to go through the whole process of shaping stones with your own two hands.
Faceting
This is the art form that has most potential to acquire profit. Everyone knows what a faceted gem is, they are only not aware of the term. Just think of an engagement ring diamond. Familiar now?
Flat, geometrically arranged surfaces that cover the surface of the gem are called gem facets. The purpose of the bottom facets is to reflect the light that is falling through the stone and to reflect it back, which makes the stone shinny and brilliant.
Faceting is performed on different kinds of faceting machines, and whether you want to take up this type of art as a hobby or to make a profit, you’ll need to make serious investment in the equipment. The quality of your equipment will reflect on the quality of your work, so do some serious research before purchase.
You won’t need an extraordinary artistic sense for the art, just check out all those machinists, engineers and other math buffs exceling at it.
Gemstone Carving
This is the most challenging form of lapidary art, and unlike cabbing, you’ll need to have a highly developed sense for it.
Gem carving is usually performed on sea shells and agates, but almost any material will do, including cabs. The cutting of the top of the cab is called intaglio (“relief carving”), and of the back - reverse intaglio.
Carvings are not found only on jewelry pieces, but on other pieces that can be turned into and sold as beautiful works of art.
Lapidary Techniques
CHAPTER 2
Gemstone that hasn’t been cut and polished is called a ‘rough’, and gemstone that has been lightly hammered to remove fractured material is said to have been ‘cobbed’. Abrasives most frequently used in lapidary work are diamond and silicon carbide.
Diamond is used for rougher grinding of wide variety of materials, while silicon carbide is used for cutting softer gemstones. Other compounds used for polishing gems are aluminum oxide, tin oxide, chromium oxide and cerium oxide.
There are several common techniques used in lapidary work: sawing, grinding, sanding, lapping, polishing and drilling.
Sawing
Sawing is performed on thin, high-speed rotating round blades that are usually made of copper, phosphor bronze alloy or steel and are impregnated with diamonds. There are several types of saws that are frequently used for cutting through gemstones: slab, trim and faceter’s trim saws. Liquids (such as water or oil) are used to prevent the blade and stone from overheating and for washing away cutting debris.
Grinding
Wheels used most often for grinding (i.e. shaping gemstones into preform) are silicon carbide or diamond wheels. Lubricant or coolant is used to prevent overheating and to remove debris.
While sawing is a technique used for removing large amounts of material faster, grinding will provide more control, and, unlike a saw, it will allow you to cut curves. Coarse grits are used for faster material removal and are used for cutting rough stones. Finer grits are used for final shaping and sanding and for grinding delicate material.
In case you use a coarser grit on a delicate workpiece, it can shatter it. To get an idea of the grinding wheel gutting power either practice on a scrap material first or always start with a finer grit.
Sanding
Sanding is a technique used between grinding and polishing, but it doesn’t require as much water as the grinding wheels. It is performed with finer abrasives to remove scratches created by coarser grinding wheels.
For round stones it is best to use flexible surfaces (e.g. sanding belts), as they will protect the round curves and prevent the creation of flat areas.
Make sure you wash your hands and stones before sanding, because any hidden grits left by the previous technique can cause deep scratches and you won’t be able to polish them out.
Sand the stone until the grinding scratches are removed and the stone gets a satiny look. Always wash the stone thoroughly before proceeding to the next stage.
Lapping
This technique is similar to grinding and sanding, however, it doesn’t use single or multiple point cutting tool, but it cuts by way of loose abrasive action. Its purpose is creating flat surfaces or spherical contours on a gemstone and improving its surface qualitative values, i.e. making it smoother.
It is a passive form of grinding preformed at low pressure, low speed with very low removal rate (from 5 to 500 microns are usually removed from each side) and is almost always a wet process. The surface achieved with lapping is dull, non-reflective (matte) surface.
The technique requires the use of loose abrasive powders as the grinding agent. “Slurry” or “lapping slurry” is a mixture of abrasive and cutting fluid and the correct ration is important for obtaining consistent, repeatable surface roughness. The material that needs to be lapped will determine the type of abrasive, and the amount that needs to be removed will determine the abrasive grain size.
There are a lot of lapping compounds out there and the prices vary considerably, so you’ll need to do some research, try a few out until you find the compound that suits your needs best. For example, lapping of very hard materials, like carbides, some ceramics or sapphire will require some diamond or boron carbide, while medium-hard materials, like harder metals and some aluminas, can be lapped with silicon carbide.
In most cases lapping is performed on flat surfaces (not spherical shapes or contours) such as one side of laps, rotating or vibrating flat disks most often made of cast iron, steel or copper-bronze alloy. Since the abrasives used can charge the lap plate surface, lap plates should be softer than the workpiece material, while the abrasives should be as hard or harder than the workpiece material.
Polishing
Polishing is a technique used for ultrafine shaping of the stone and achieving a mirror-like finish that is a reflective surface. In other words, it is what enables the reflection of the light on the surface in case of the non-transparent materials, or the refraction through the stone in case of the transparent materials.
Polishing is a “wet” process performed by using a fine or sub-micron abrasive particle combined with some sort of a liquid. Some applications require thorough water rinsing during the end of the process with the purpose of removing polishing debris and preventing the staining of the surface.
Loose abrasive doesn’t have to be used, as usually a pad containing abrasive grits is utilized in the process. Due to the usage of the pad and a slurry the surface tension is quite high if compared to lapping.
Polishing removes very little material, so the surface must be well prepared and already of high-quality before this process (pre-polished surface is often a surface that was previously lapped).
Drilling
Lapidary drilling is making small holes in through gemstones in the purpose of hanging them by a cord or creating a thread of stones. It is done either with a small rotating rod with a diamond tip mounted in a rotary tool, such as Dremel, or used in a drill press. The or ultrasonic or vibrating drills are extremely effective, but rather costly, so it might not be your prime choice.
It is recommended to always use a coolant, as that will increase the life of the product and the value of your workpiece. Never force the drill bit, rather let the diamond do the cutting. Always drill on a slow to moderate speed, because if you drill on a high speed, you’ll rip off the diamond plating. Important is also to frequently take the drill bit out of the hole and clean it with water to remove debris. Plenty of water during the drilling is also recommended, just take all necessary safety precautions first.
Mark the drilling points on the both sides of the stone and start cutting under a slight angle until the drill bit starts to bite into the stone. Only then you should start straightening it up in the direction you want it to go. The stone should be gently pressed on the drill bit, and you should allow the water to reach the drill tip constantly during drilling, so use up and down motion.
Never drill right through the stone as you might end up with a crater. Instead, drill about half to 2/3 of the way, flip the stone over and start drilling on the other side through the marked point. Your precision might not be excellent right away, but you’ll get the sense of lining up the holes over time. After you finish drilling, the hole will have sharp edges, which could damage the stinging material, so gentle grinding or smoothing is required.
Lapidary Equipment
CHAPTER 3
Lapidary work involves using a series of grinding wheels and belt sanders usually with water cycling in the system. The most important thing for a beginner lapidarist is to get a start-up equipment that will enable some sort of progression of the grits and to get a handle on the graduated stages that involve grinding, sanding and polishing.
The choice of equipment is usually limited due to the knowledge and the cost. In case you are just starting, you’ll at least need a trim saw and a cabbing machine. With Diamond Pacific Genie with 6 wheels and a separate machine for cutting slabs, you’ll get yourself a more than a decent setup.
You can buy additional arbor type set-ups only for convenience, as it will enable faster and easier transition between the greater variety of abrasive wheels and papers. But, if you’re not ready and able to invest more money in additional arbors, you’ll still get the work done, you’ll just need to spend more time removing and replacing various grits and wheels that came with your combo unit.
But, first thing’s first. For all you newbies, we’ve decided to write a guide through different tools and equipment used in lapidary work.
#1 Lapidary Slab Saw
The size of the slab saw blades ranges from 6-36″ (typically 16-24″) in diameter with thickness of .025” to .200”. They are designed for heavier cutting, used to cut rough rocks of several inches thickness into thin slabs (usually 1/8-3/8″).
Thicker blades can give you a nice manicure if you are not careful, so pay attention to your safety when cutting stones with a slab saw. Also, make sure that the stones are fed straight into the blade when operating a slab saw, because if fed at an angle, the blade might bend which can damage it. You don’t have to pay as much as attention to this when operating a new slab saw but be very careful if using a used one.
Most of slab blades are diamond blades, but old-school mud saws are still on the market. Mud saws don’t have abrasives on the blade, but the blade runs through an abrasive groove (usually silicon carbide) or “mud”. The mud saw is much cheaper than the diamond blade saw, but it requires more maintenance, as the abrasive wears off with use. However, with proper use and maintenance, a mud saw can be a perfect, yet cheap tool for rough stone cutting.
#2 Lapidary Trim Saw
Trim saws are typically 6-10″ in diameter with thickness between .004” and .012”. The thin blades are designed to remove just a small amount of material and are used to trim basic shapes from slabs. They are used to either cut smaller stones into thin slabs or to cut small sections out of them.
Very thin blades of .004” to .006” bend more easily and they can be extremely dangerous, so watch out for your fingers as you could lose them. Unless you’re working with material that is very expensive, it is recommended to use thicker blades. You don’t have to use any additional lubrication with these saws, water is sufficient. However, in case you want, you can add a liquid for preventing rust which also has lubricating properties.
The stone is fed to a trim saw by hand. Here too you'll need to be careful to feed the stone straight, as it will bend otherwise. Since no manufacturer recommended that you should feed the stone to the blade by actually holding it in your hand, you might want to think of a way to do it differently.
For example, you can press a small stone on a piece cardboard and then slide the cardboard towards the blade. However, in some cases the cardboard-way can get difficult, so you’ll need to use your hands after all. The trick is to mark the stone for cutting and to keep your eye in line with the blade, use gentle movements and look out for bending.
Slab and trim diamond blades vary in size and in price. The price depends on the amount of the diamonds bonded. In case you are a hobbyist, any good quality blades with rolled or bonded diamond abrasives will do. A better choice for a professional who uses the tools frequently is a sintered blade with a rim with diamonds throughout it, not just on the surface.
More diamonds mean higher price, but also a longer-lasting tool. Professional or not, just stay away from blades that are extremely inexpensive. You might be thrilled to come across a blade that is considerably cheaper than other blades on the market, but keep in mind that there is a reason for every price. Cheap blades will cut a few stones and you’ll be done, so it’s not worth your money nor your time.
#3 Cabbing Machine
Cabbing machine holds several wheels of progressive series of diamond or silicon carbide grits that are turned by a common arbor and a motor, and a water supply to wash away the debris or to prevent overheating of the stone.
There are a lot of options and there is a serious difference in the price. Choose a machine based on your needs and the type of work that you do, and always think practical.
In case you do this for a living and not occasionally, it’s best to look for machines with a lot of wheels and a separate machine for cutting slabs. Less wheels mean that you’ll need to change the pads and wheels a lot which is tiresome and a waste of precious time. In case you have a machine with 6 wheels, for example, you’ll easily move from a rough to soft wheel.
#4 Lapidary Grinding Wheel
Lapidary grinding wheels are usually metal wheels with abrasive particles (usually diamonds) bonded on their surface, or they are entirely made of an abrasive material, such as silicon carbide.
Metal wheels are more expensive, but they last longer, while abrasive wheels are less expensive and wear slowly, so you’ll need to occasionally dress them with a dressing stick. Wheels are oriented vertically in a lapidary machine and the stone is ground against the wheel's circumference.
Most units come with one or more sanding drums or rubber wheels that hold sanding belts, while a lot of units have polishing attachments like flat discs or polishing wheels as well.
#5 Lapidary Flat Lap
These can be either rotary or vibrating and are used to grind or to polish slabs or other flat surfaces, such as some types of cabs, crystals and geodes.
Vibrating laps are similar to tumblers, because they use polishing powders or silicon carbide grit in the same way the tumblers do. Place the slab face down on the lap, add the grit and little water, sit back and enjoy the view. In some case you can use weights to secure the contact between the work piece and the lap, which will speed up the process.
Rotary flat laps, on the other hand, are machines with a rotating abrasive disc. The abrasive disk is oriented horizontally or vertically in a lapidary machine and the stone is ground against the flat side of the disk.
#6 Lapidary Polishing Wheel/Lap
Lapidary polishing wheels, belts, laps and pads are used to smooth out small uneven surfaces of your stone and to bring it to a perfect shine.
There are a lot of different types of pre-polishing and polishing wheels on the market, made of different materials and different grits. Depending on your work, you’ll probably use more polishing tools for achieving the desired look on a stone.
Most commonly used lapidary polishing tools are rubber belts, leather wheels and rubber bonded silicon carbide wheels of different grits. Depending on the polishing tool and the workpiece, you’ll also use some lapidary polish.
#7 Lapidary Combination Machine/Unit
Combination machines are any combination of lapidary devices in one unit (e.g. a trim saw with grinding and polishing wheels). Highlander Park offers nice combo units with different grit diamond sintered wheels and the option to attach flat metal disc with felt padding and a leather pad and to mount rubber padded discs when needed.
Another manufacturer of lapidary equipment and various combo units is Covington Engineering from Redlands, California.
CRATEX Lapidary Tools
CHAPTER 4
Silicon carbide is used in modern lapidary due to its quality and durability. In case you are looking for silicon carbide abrasives of highest purity, CRATEX Manufacturing Co. offers premium quality lapidary supplies in San Diego with nation-wide shipping!
The bond used in CRATEX abrasives is made of premium grade oil-resistant chemical rubber and two bonds are available: standard and hard bond. Standard bond has a unique cushioned action, it cuts smoothly without digging into the workpiece, so these abrasives are perfect polishing, pre-polishing or sanding tools for gemstones and other materials such as glass. Hard bond is not available in kits and is perfect for light grinding.
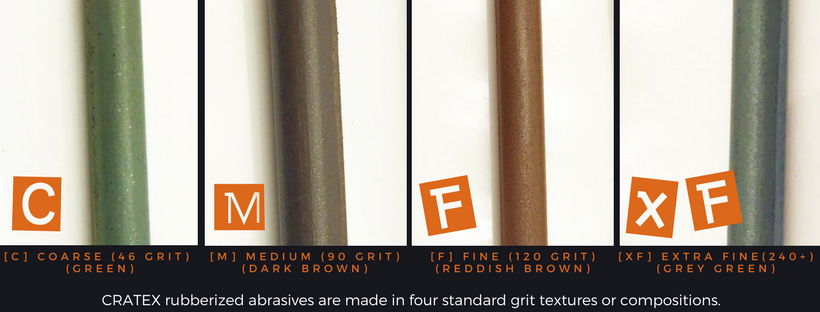
Both bonds come in all shapes and sizes and four standard grit textures: coarse (C), medium (M), fine (F), extra fine (XF). Having the abrasives in different grits can make your job a whole lot easier, as you would work with progressively finer grades until you reach the desired polish or pre-polish. You can charge your tools with different grits to use them for different cutting, pre-polishing and polishing action.
NOTE: Standard products can be modified to meet special requirements or needs. For example, by using lower operating speeds and using a lighter pressure the action of the tools can be softened, standard shapes can be dressed and shaped into special contours, etc.
CRATEX tools used by lapidarists most often are listed below.
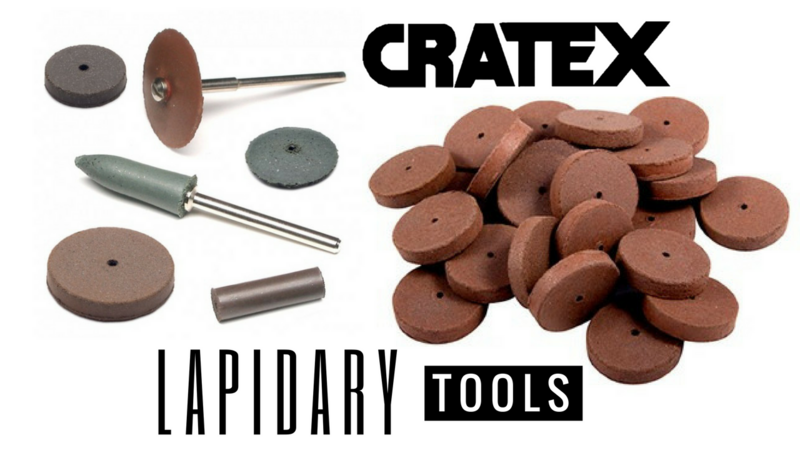
1. CRATEX Large Wheels
Large lapidary wheels are used for wet sanding of gem stones, smoothing glass edges and different kinds of smoothing and polishing operations on lapidary machines. Their size of the straight wheels ranges from 1"-1/2" to 6" in diameter and thickness from 1/8" to 1".
2. CRATEX Small Wheels
Small lapidary wheels come with straight and tapered edges and are perfect for fine work on small delicate parts such as gemstones. They are easily mounted on lapidary hand tools, such as Dremel or CRATEX Rotary Hand Piece, or flex shafts and are used for pre-polishing, polishing away scratches, smoothing, cleaning out and finishing decorative designs. They are excellent tools to prepare the gem surface for carving.
The diameter of the wheels ranges from 3/8" to 1" and thickness 3/32" to 1/4".
3. CRATEX Points & Cones
Lapidary abrasive points are made in cylinder, bullet and tapered shapes and are perfect for smoothing and polishing hard to reach surfaces, such as drilled holes in gemstones and edges.
Abrasive cones are easily shaped by using a dressing tools to match the requirements of your work, and, like points, are usually used for hard-to-reach areas of your workpiece.
4. CRATEX Dressing Sticks
Square and oblong sticks are excellent hand tools used for shaping CRATEX rubberized abrasive bits and for dressing lapidary diamond wheels and CRATEX lapidary wheels.
5. CRATEX Kits
In case you are looking to give any of our products a try, check out one of our Mini Kit selection. There are four types of test kits: small wheel, stick, block and points. The shipping and handling are included in the amazing price of $36.58, so how could you say no to this deal?
CRATEX also offers various types of introductory and combo kits, so check out the full offer here.
Recommended:
.
Lapidary Work Safety Precautions
CHAPTER 5
Three Routes of Chemical Entry: Breathing, Skin Contact and Eyes
Lapidary work is a unique, beautiful art with some serious health risks that mustn't be overlooked. Primary routes by which dangerous substances can enter the body of a lapidary artist are inhalation (breathing), skin and eye absorption.
Namely, we’ve seen that lapidary work involves a lot of cutting, grinding and polishing of the gemstones and those operations cause stone dusts that can be very hazardous. Besides, polishing compounds and pastes are made or various chemical and abrasives that can also represent a serious health risk.
One of the most common occupational diseases among people who cut and polish stones are silicosis and silicotuberculosis. Silicosis is a serious lung disease that can even be deadly and is caused by inhalation of stone dust as well as organic material dusts (quartz, granite, sandstone, brownstone, slate, jasper, opal, onyx, amethyst, soapstone, diabase and serpentine).
It manifests as inflammation and scaring in the upper lobes of the lungs. Diamond-saw cutting of the gemstones can produce oil mists. Oil mists can form aerosols which if breathed in can cause serious lung damage. Soapstone, serpentine and greenstone often contain asbestos which if inhaled can cause lung cancer, mesothelioma (type of cancer that develops from a thin layer of tissue that covers internal organs) and asbestosis (long-term inflammation and scarring of the lungs due to asbestos).
Dusts as well as the flying fragments, especially when doing the drilling, can also cause serious damage to the eyes.
Dermatitis, or the inflammation of the skin, is another group of diseases that can be fostered by various cutting fluids (oils and lubricants) soaps and water used in lapidary work. Namely, the water in the systems of lapidary cutting machines is often rarely changed, which means that it can easily grow fungus and molds.
What adds to the seriousness of water that sits for so long in lapidary workshops it the facts that there were even cases of lapidary suffering from Legionnaires' disease which is a form of atypical pneumonia caused by Legionella bacteria. The bacteria contaminate the water and is spread by inhaling the mist that contains it.
Electrocution, death or injury caused by electric shock is also a danger. A lapidary can also suffer from the “vibrating syndrome” or “white fingers” disease which is caused by the continued use of electric, vibrating tools.
Safety Precautions to Use
One of the best ways to protect yourself is to be fully aware of the danger of the materials and tools that you are working with. For example, in case you are working wet, you need to get flexible shaft attachments to keep the electric tools away from water splashes, and you need to get a ground fault interrupter for the equipment wiring.
Make sure you pick power tools that produce low vibrations and have comfortable hand grips to prevent “white fingers”. Don’t grip them too tightly, take breaks and make sure your work environment isn’t cold. Wear hearing protection if you need to and, of course, an eye protection is a must.
Also, one of the first things you should do is get Material Safety Data Sheets (MSDS) for all products that you are working with and get familiar with the dangers of the material you are cutting, and abrasive material used for grinding or polishing. Routine chest X-rays are highly recommendable.
Wear waterproof clothing when preforming lapidary work and choose cutting oils that don’t contain nitrates or amines. If your work clothing does get contaminated with oils, it’s best to change it immediately and have it dry cleaned. Make sure you wash the exposed areas of skin with soap and water, shower frequently and use nonamine barrier creams as protection.
Always think of Legionella bacteria and get that dirty water changed frequently! You might not be the lucky owner of these exact bacteria in your workshop, but some other nasty bacteria and mold will build up in the containers for sure. So, don’t be nasty, keep a tidy workspace!
What isn’t as serious as the health risks and diseases described above are the ugly and uncomfortable damages to your fingers and fingernails that are very often in this line of work. Some people use wax to adhere a dop stick to the back of the stone, so that they can maneuver it on the wheels easily and safely, but other people don’t like to do this and prefer to work with their hands (and in some cases, hands are the only tool you’ve got).
Be very careful not let the surface of your wheels touch the surface of your fingernails. It is something that you won’t notice while working, but after you’re done with a few stones, you’ll have raw, thin and sore fingernails for the next three days. Also, don’t let your fingers to touch the sides of the wheels as you’ll get open cuts. They’ll hurt for sure, but more importantly, an open wound, abrasive material and water are not a very good combination to say the least. So, be careful and keep your little piggies safe!
Quick tip: An easy, quick and cheap way to protect your fingers is to wrap alligator tape around the fingers you use in your lapidary work.
Another advice would be to make sure that the hose you hook up to the machine with wheels drains the water properly. If it doesn’t, you’ll get water all over your working table and floor. Since you could easily spend the day without mopping up the floor and wiping up your work surface, always check if your drain hose is properly in place. In case the water is dirty or there are unsecured power tools around, the importance of checking the hose before you start working gets a new dimension.
And remember: always remove your blades when you finish work and store them properly.
